I have created a few scientific journal covers and renders. Eager to make their own designs, a few colleagues asked me about the process. It’s not a super fancy process and was refined out of a designs I’ve done over the years. The process attempts to go “from nothing to done” while accounting for changing requirements, rollbacks, and tweaks.
Tools
- Pen & Paper
- Blender 3d
- PDB2Blend
- Photoshop (or GIMP, if you want a free alternative)
Design
I used to jump straight into modelling; however, experience shows that spending some time to design is time-effective: a well thought out design is much easier to implement than a vague one. With that in mind, I usually spend at least an hour or two throwing out random ideas until something “clicks”. My ideas are usually pretty simple, conventional designs. If you are artistically talented, here’s the chance to go wild.
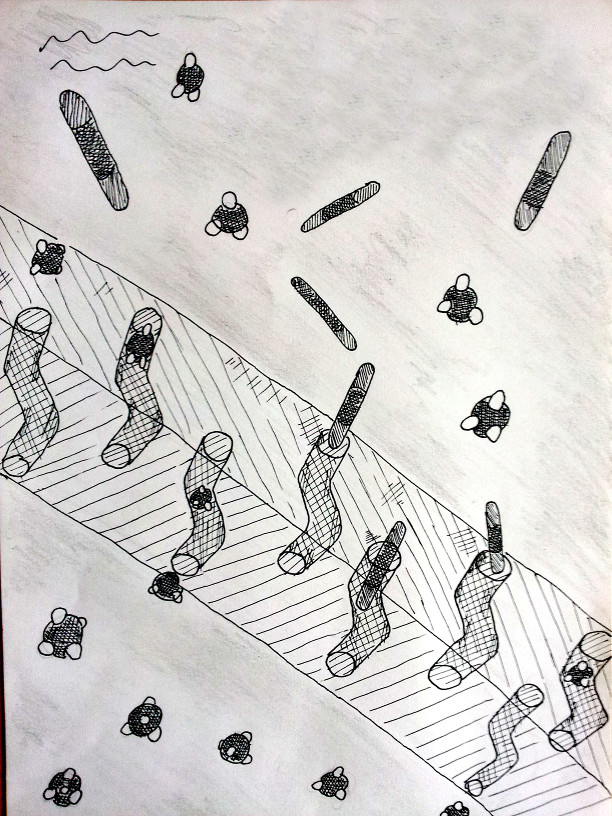
I sketch up a basic concept drawing at a high enough fidelity to communicate the idea without overcommitting time to drawing. This might seem like time that could be better spent modelling but it’s worth it: having a blueprint on paper makes it amenable to quick tweaks. You can also send these drawings to stakeholders and get an immediate opinion. If it turns out they hate it then you’re only “down” a sketch, rather than a full render.
Setup
Once I’ve got an acceptable design, I’ll setup a standard project folder. I use the structure below. Keeping the project structure the same between projects makes it easier to write scripts and keeps assets etc. in predictable locations.
$ ls project-folder
assets/
correspondence/
tools/
concept-art/
journal.md
composition.psd
render.blend
render-raw.png
render-post-processed.png
render-post-processed_with-headings.png
I also recommend using a version control system such as git or cvs
so that you can snapshot your work at any point. It keeps the project
folder clean from the usual
composition-before-i-went-to-bed-on-wednesday_final_real-final.psd
file names that pop up whenever version control isn’t used. If version
control seems scary then maybe establish a convention where you back
up your work folder each day and name it by date.
You might also notice the correspondence/ and journal.md
files. They’re a long-term investment. Whenever I get a new project I
consult those two resources in previous projects to try and get an
idea about what what went well and want went badly the last time.
Setup (render)
I can’t make too many specific recommendations here. How you model a scene will be based on your previous modelling experience. However, one thing I will recommend is to make as much of your composition as possible programmable and logically labelled. This is because—like any project—a large proportion of rendering time will be spent tweaking and moving items around the scene. If resizing a “xenon atom” (sphere) has to be manually done for each sphere in the scene rather than adjusting a “parent” atom then you’ll have a sad time.
Initial Prototype
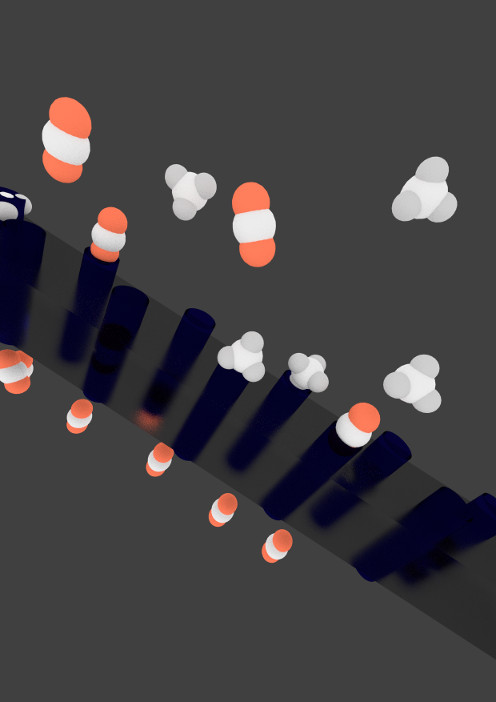
Using the concept drawing as a template, I’ll model the composition. Even for a prototype, I’d recommend modelling carefully. Haking the perspective and meshes so that they look good at one particular angle with one particular lighting setup is a recipe for disaster in the tweaking stage.
Once the scene is setup, I’ll pick materials that are vaguely right and prepare a first render. The first render only need a few basic touch ups. The main idea here is to get something rendered that’s close enough to the final goal that stakeholders know what to expect of the final render—moreso than the concept art, at least—but the prototype isn’t so close that you’ve over-invested. Because, like any process, changes will be requested.
Feedback & Tweaks
Once I’ve got a prototype, I’ll send it over to stakeholders. Unlike the concept sketches, a prototype is much closer to the appearance of the final product. Because of that, I tend to recieve much more detailed (read: nitpicky) feedback. This can be a good thing; however, I’d recommend to keep the background of whomever gives feedback very clearly in mind. Scientists tend to prefer scientific accuracy over artistic vision. Artists are entirely the opposite.
Ultimately, though, the target for a design is whomever we want to publish it. In the case of journals, this is usually either a designer or editor: they (probably) just want a nice-looking cover for their next monthly issue. In the case of being paid by the stakeholder, regardless of the design being published, your target audience is them, so do whatever they say.
While art might have elements of NP complexity—it’s much easier to appreciate excellence of a complete art piece than it is to create it—opinions tend to dominate the feedback process. Because of that, I’ve had to make design decisions that maintain artistic clarity but annoy some stakeholders. The trick isn’t to make it into an us-vs-them scenario; rather, a “composition must win at all costs” one. Perform tweaks based on that instinct.
Final Render
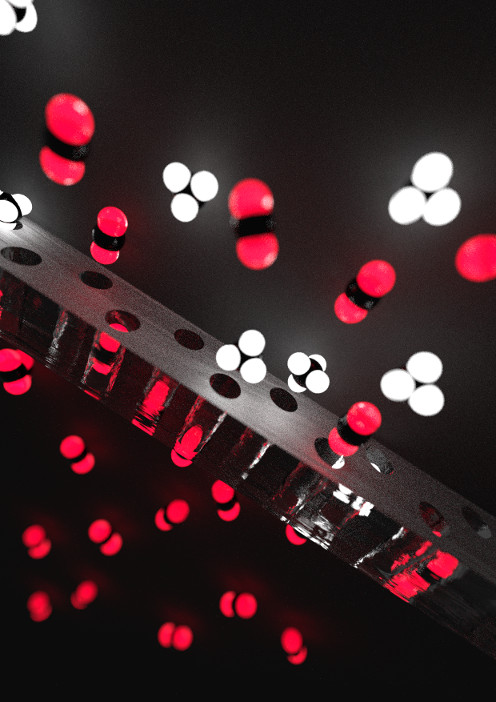
Once I’ve made the final tweaks to the composition, it’s time to perform the final render. At each step of the creation process, changes have become increasingly expensive to make. A high-fidelity (>300 DPI A4) render will likely be computationally expensive, so this is usually the part where the design is “set in stone”. Make sure you (and the stakeholders) are ok with it—you don’t want to have to re-render and -touchup.
Getting the Most Out of the Render
Post-processing and manual touchups can be the difference between a composition that looks flat and one that “pop” (I hate that word). Once I’ve got a render that I know won’t change much as all, I’ll spend a while touching it up. This requires a little basic experience with a drawing package such as photoshop or GIMP. But, in most cases, it comes down to changing the levels, hue, and saturation and doing manual touch ups with burn/dodge tools.
And that’s it. My process for making covers. No magic, no super-advanced tricks or funny gizmos. Just paper, a free 3d renderer, and some photo manipulation software. I hope you found it insightful. In general, my actual skill at each part of the process hasn’t explosively improved other the years but, rather, I now spend more time designing and planning the work. I’ve become a true old-guy ;)